
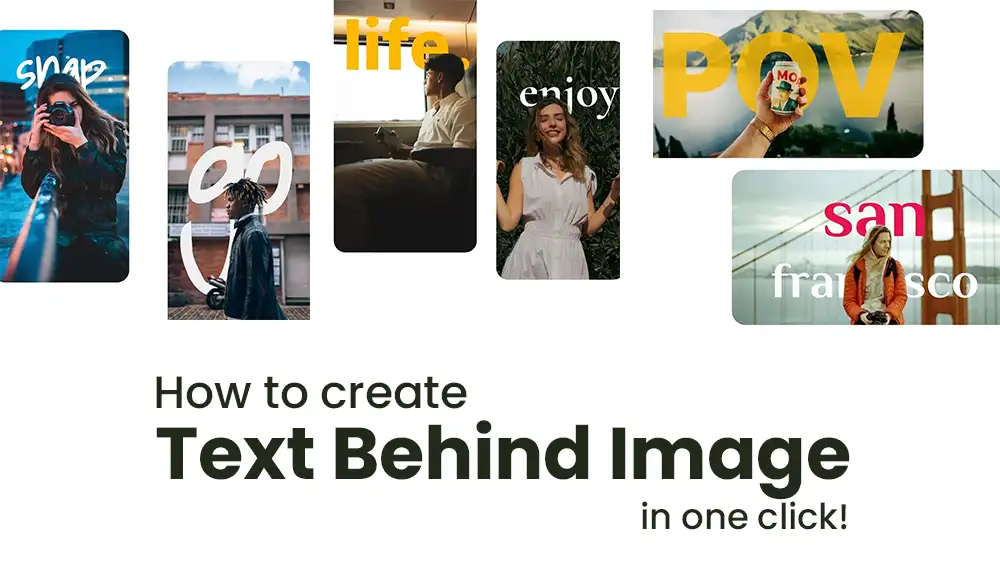
Do you need an easy yet effective tool to design attention-grabbing visuals where text elegantly sits behind an image? You’re in luck! The Text Behind Image Editor is here to transform your design experience. Whether you’re a social media user, a blogger, or a professional, this tool is ideal for making amazing visuals with ease in a matter of clicks.
What is Text Behind Image Editor?
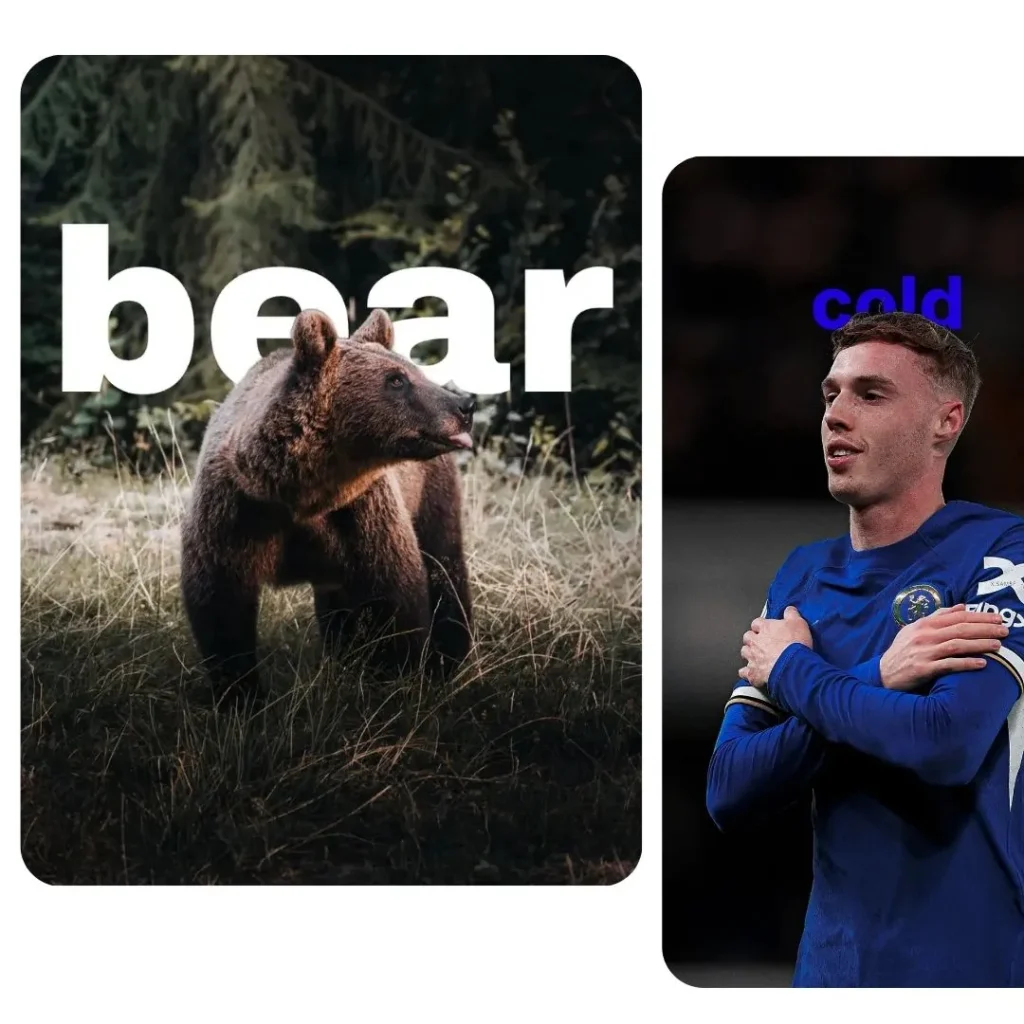
The Text Behind Image Editor is an online application where you can insert text behind an image to give it a new and creative effect. This is ideal for social media post creation, banners, posters, and other materials. With its user-friendly interface and easy-to-use features, beginners can also achieve professional-grade designs with ease.
Key Features of Text Behind Image Editor
Easy-to-Use Interface: Don’t have experience with design? No worries! The tool is created for users of all expertise levels.
Why Use Text Behind Image Editor?
Time-Saving: Make beautiful designs in minutes without having to use advanced software such as Photoshop.
No Installation Required: It’s a web application, so you can access it on any device with an internet connection.
Free to Use: No secret fees or subscriptions—just plain creativity!
Versatile: Ideal for social media posts, blog graphics, ads, and more.
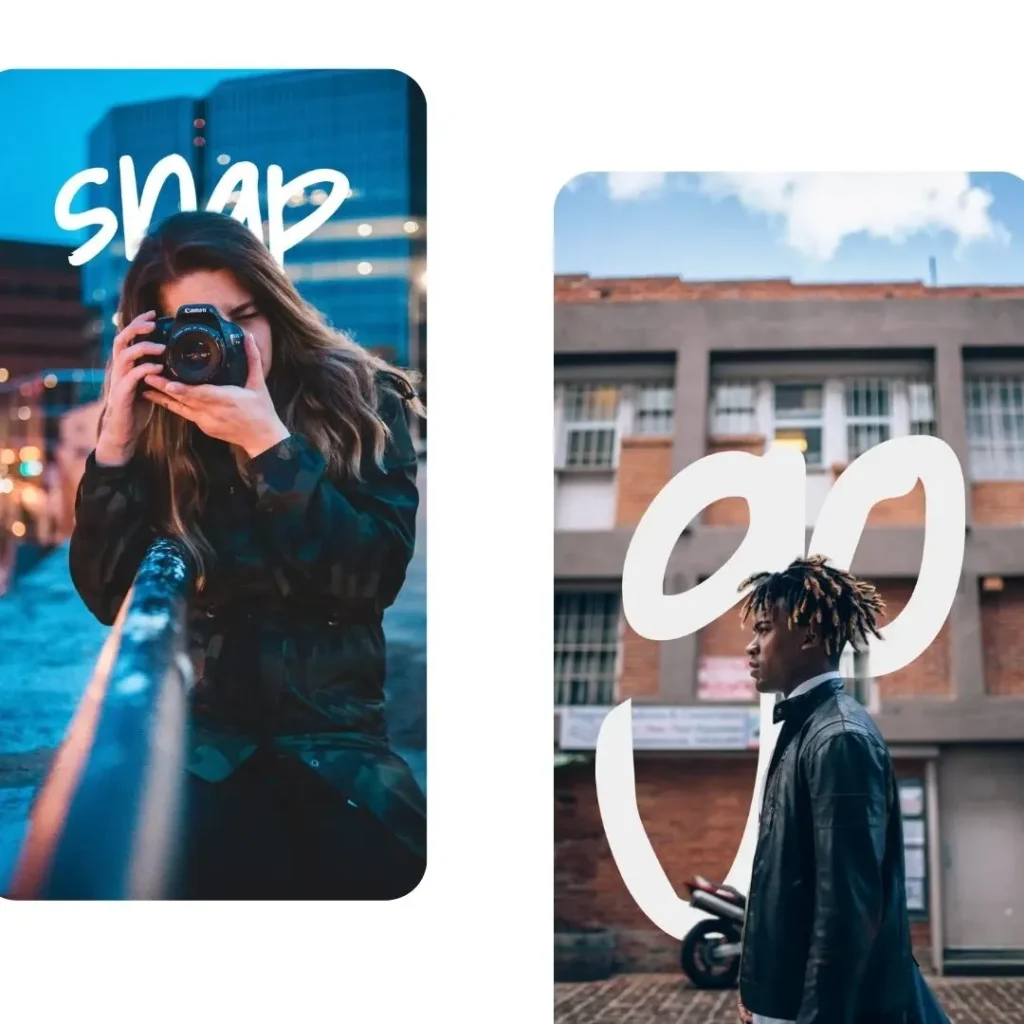
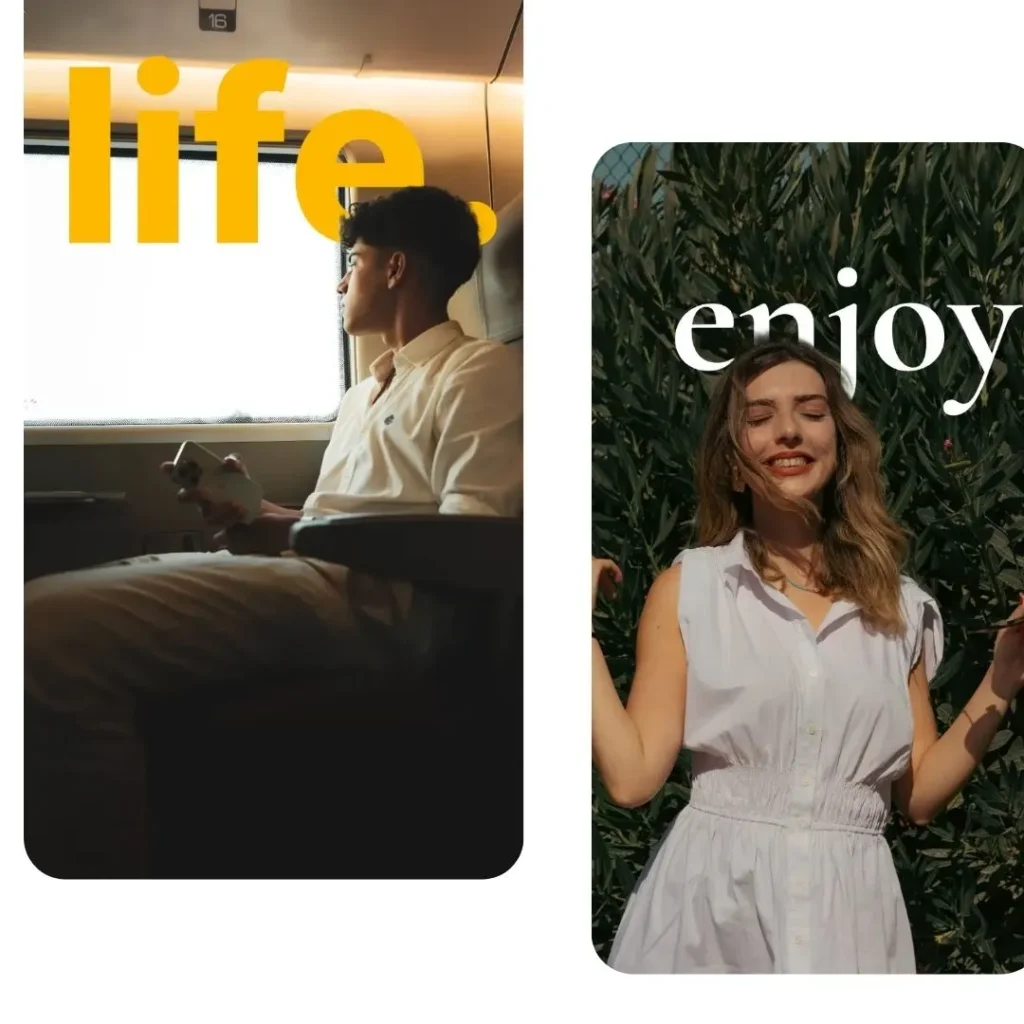
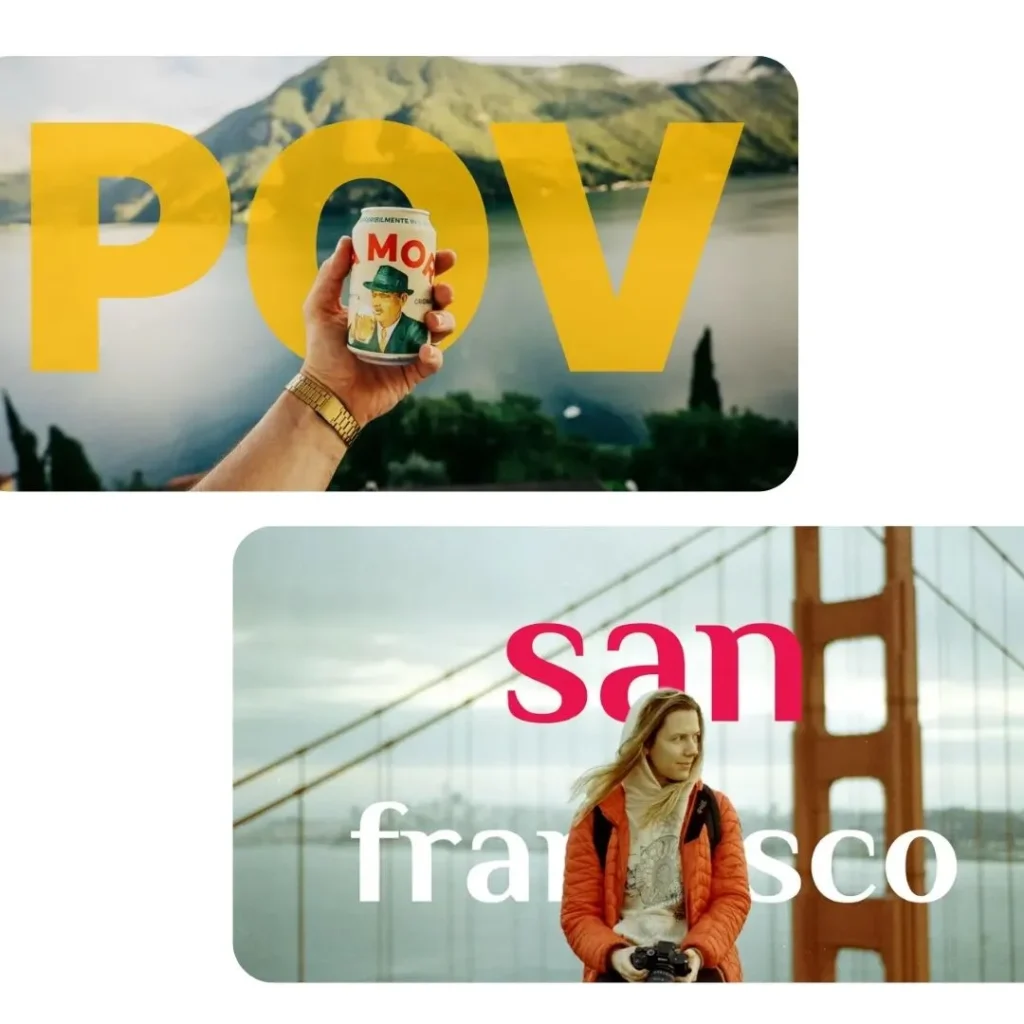
Images courtesy: https://textbehindimage.rexanwong.xyz/
How to Use Text Behind Image Editor: Step-by-Step Guide
Working with the Text Behind Image Editor is very easy. Here is a step-by-step guide to help you:
Step 1: Go to the Website
Open Text Behind Image Editor using your favorite browser.
Step 2: Upload Your Image
Click on the Upload Image button to upload your own image.
Or, use the default image provided by the tool.
Step 3: Add Text
Type in your text in the text box.
Customize the text by adjusting the font size, color, and style.
Step 4: Position the Text
Drag and drop the text to position it behind the image.
Use the transparency slider to adjust how much of the text is visible behind the image.
Step 5: Preview and Adjust
Use the real-time preview feature to see how your design looks.
Make any necessary adjustments to the text or image until you’re satisfied.
Step 6: Download Your Design
Once you’re happy with the design, click the Download button to save it to your device.
Your design will be saved in high quality, ready to be shared or printed.
Creative Ideas for Using Text Behind Image Editor
- Social Media Posts: Create unique Instagram or Facebook posts that stand out.
- Blog Graphics: Add a creative touch to your blog headers or featured images.
- Advertisements: Design eye-catching ads for your business or brand.
- Posters and Flyers: Utilize the tool for designing promotional pieces for events.
- Personal Projects: Try out the tool for play projects such as greeting cards or invitations.
- Best Results Tips
Select High-Quality Images: To achieve best results, select high-resolution images. - Try Fonts: Experiment with fonts and color to determine what works best in your design.
- Keep It Simple: Do not overdo the design with much text or details.
- Use Contrast: Make the text readable by employing contrasting colors between the image and the text.
The Text Behind Image Editor is a game-changer for anyone who wants to create beautiful visuals quickly and easily. Whether you are a professional designer or a beginner, this tool has everything you need to make your creative visions come true. With its easy-to-use interface, customizable options, and real-time preview, designing has never been so enjoyable and easy.
Then what are you waiting for? Join Text Behind Image Editor today and make your wonderful designs within minutes!